I had the magnificent pleasure of working on a multi-faceted photo shoot with actor / philanthropist Noel Gugliemi from the blockbuster movie series, The Fast and the Furious. The purpose of the shoot was to create a range of images that were to be used for editorial purposes, as well as for publicity. I was initially contracted by talent agent Gloria Hinojosa of AEFH (Amsel, Eisenstadt, Frazier & Hinojosa, Inc.), in which we discussed the planning of the photo shoot. Noel had not done a professional session for well over twenty years, so our intent was to create as many looks as possible in a three-hour session.
SHOT LIST
What Gloria needed from the session with Noel, was specific, and in a sense quite straight forward. Nothing conceptual or requiring extensive storyboarding. A clean publicity shot, highlighting him in the best possible light, a commercial head shot, which is also used as a press shot, and a theatrical publicity shot. We also were able to create an editorial lifestyle shot and one outdoor shot with a classic GTO car, which was to be used for an upcoming project. Not to mention that Noel and fast cars are synonymous with his brand. To keep the attention on Noel, we used clean backgrounds, relying on great authentic expressions, and strong character lighting. It seemed simple, but to accommodate the range of looks, the style of lighting had to be adjusted or simply changed every time. Using the new SpyderCheckr Photo came in quite handy. In photo shoots that are fluid, indoors and outdoors, I can keep it in my back pocket and grab a shot before every lighting change.
CREATING A STUDIO ENVIROMENT
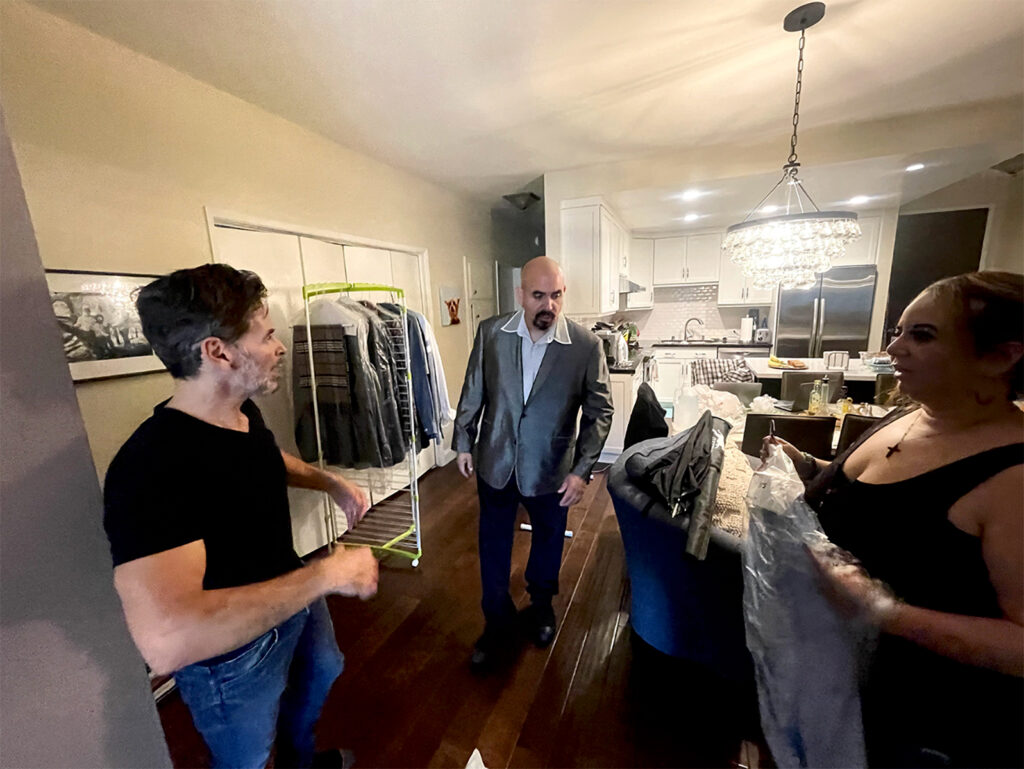
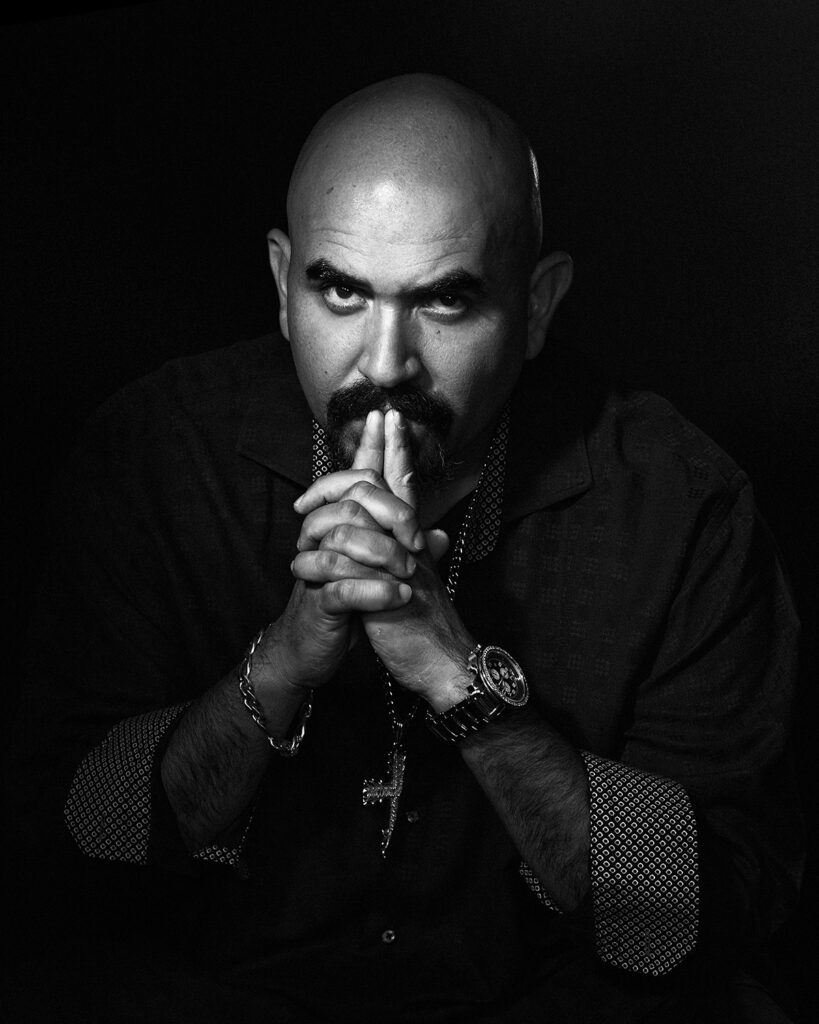
Here are some tips for those of you who have or are thinking of creating a home studio. I get asked quite often whether it is a promising idea to have, or work in a home studio environment, and my take on that is – It depends on the job and on the client. For my commercial work, new clients, or most celebrities, I often shoot in a commercial space. This opens the opportunity in creating multiple setups with varying lighting, and the subject simply just walks in on set. In my initial conversation with the client, I determined which direction I would go. There are many times when my clients are quite content shooting in my home studio. Reasons for can range from maintaining a private set, a scheduling conflict with studio rental, or simply the location is more convenient. Ultimately, they are confident in my work and trust me, which makes them comfortable and open to my suggestions. One important note to keep in mind when working from home is the overarching thought, “first impressions are one time.” Maintaining a professional and clean working environment is extremely important. The more you can streamline your environment, the better it will make for a creative space. Having amenities such as a vanity room with hair and facial products, a large body mirror, as well as an allocated changing room with a wardrobe rack is important. Just as important is having a set place for refreshments, snacks, fruits, and if the shoot runs long, an actual lunch break. When working with a makeup artist, you also need to create a comfortable space for him or her, a table for the makeup tools, and make certain you have great lighting. Open natural light is great, but many times I use a large LED lamp with silk diffusion. If you do not get this part right, it will reflect on your final shots. Also, have some seating options for your client. For the clean headshots I usually will have one posing stool without any backing, one or two decorative chairs with arm rest for the publicity shots, and a posing table, which helps for hand placement, and are good for expressive theatrical closeup shots. Theatrical shots are usually low-key lighting with strong character expressions and are quite commonly used for actors. I usually like to hint at an expressive attitude such as a confident, alluring, pensive or stern looks. Lastly, around the studio I have a couple of apple boxes with a. neutral finish, which is great for foot placement and sometimes can be used to sit your subject.
SETTING UP LIGHTS
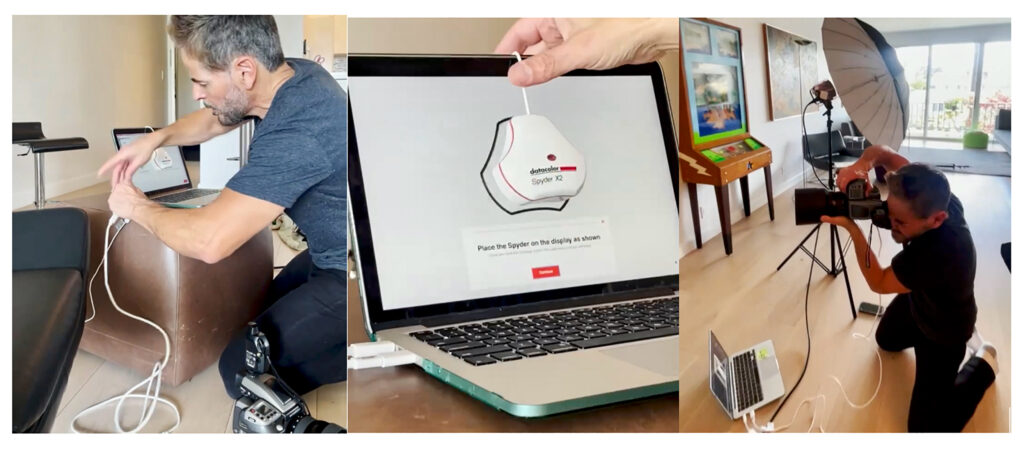
The first thing I had to consider was the amount of natural light in the room. Though the shoot was to take place in a large room in front of three large bay windows, it was still not enough to affect my overall exposure when shooting with strobes. Just as long as my shutter speed was over 1/60th of a second. Dragging my shutter speed any lower would register the ambient exposure. Initially I thought of creating some portraits with natural light, and adding a LED light as a kicker, but after testing, even with an ISO in the 400-800 range, my shutter speed would be in the 1/30th to 1/60th range, and would have required a tripod, thus impeding a natural flow with my subject. Since these were for commercial usage, I also needed sharpness throughout the entirety of the image, so I decided to shoot strictly with strobes.
TIP: Prior to beginning your session, it is good practice to create your shot list with lighting diagrams, and gear section. It saves a lot of time trying to think these things out when your client is in front of you. You can also define what type of lighting style you will be creating, whether hard light or soft light. This in turn will facilitate your modifier selections. When working in a home studio scenario, I try not to get too complicated with my lighting and with the number of lights I will be using. Mobility and space are two important considerations when working at home. Once the lights are set in place for the first shot, I can quickly adjust lights throughout the multiple setups.
TETHERING TO COMPUTER & MONITOR CALIBRATION
If you are not doing this yet, you should highly consider shooting to computer or laptop. It at least gets you to an accurate starting point, and you can quickly unplug if it becomes cumbersome for you or your client. Most of my work is for commercial purposes, whether editorial print, branding media or poster usage, so for this reason I like to review the highlights, shadows, and color accuracy in real time. To be certain that what you are seeing is what you will produce later, you need to first start with a properly calibrated monitor. I start every photo shoot, whether in studio or on location by calibrating my monitor with the Spyder X2 Elite. This process is quick, under two minutes, and extremely valuable. To highlight a few features, the scientifically engineered software will run a series of tests, checking your color gamut, monitor brightness and black and white points. I rely on this, as most of my work is used for print, and I can confidently review that the latitude between my shadows and highlights is accurate.
SPYDER Checkr Photo
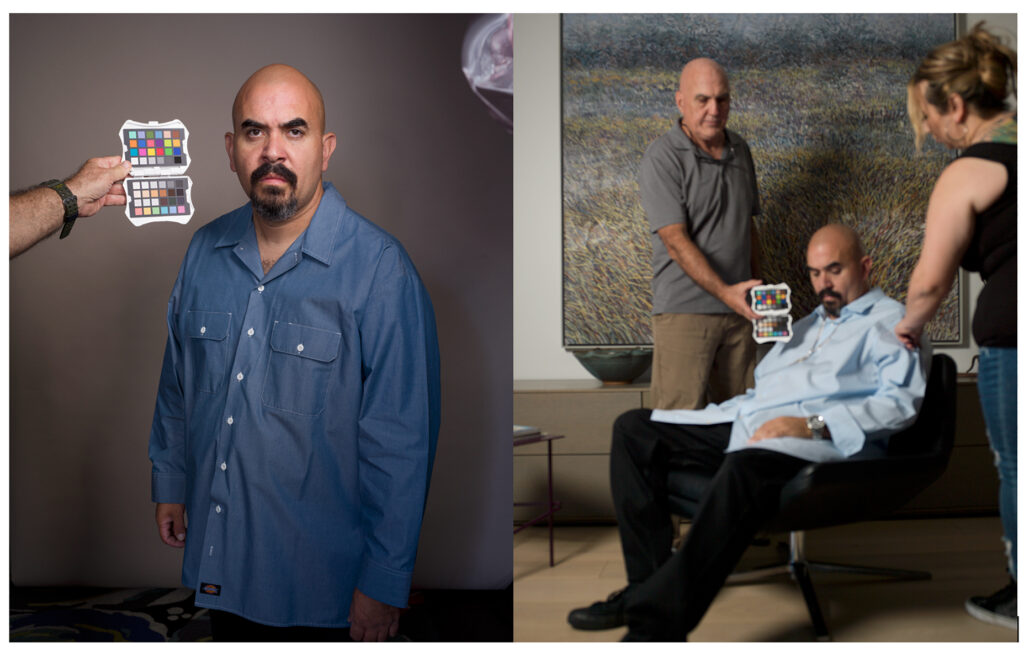
Before every set change, or lighting scenario change, I take a picture of a color reference chart, whether 24 or 48 swatches. There is a time and place for the Spyder Checkr, but lately I have been working with the new and versatile Spyder Checkr Photo, which makes the process quick and convenient. One convenience is the fact that I can quickly fit it in my back pocket and pull it out as my target color reference without inconveniencing my client. I also use it for an in-camera custom white balance reference for accurate capture. Though it is compact and smaller than its bigger predecessor, its ultra-matte color swatches deliver the richest colors and deepest black with lower reflectivity, especially when using direct flash. This ensures truer and accurate color calibration when working in the RGB color space, irrespective of your digital camera choice. I sometimes use 3 different cameras in any given session. The SpyderCheckr camera calibration is intended to improve the accuracy and consistency of your camera’s color and under different light sources. In the case of the session with Noel, as he was getting prepared for his first shot, I was able to take a test shot with the Spyder Checkr Photo tethered directly to Hasselblad Phocus software. I adjusted the white, black, and neutral gray patches to make sure my highlights were not clipped, and my shadows were retaining detail. I then saved the file and named it, usually to a name that states the person’s name, lighting used, and color profile selected). in this case it was; “Noel_Flash_Portrait 1”. I then opened the file in Spyder Checkr software and created a PORTRAIT color profile and used it for all the images set with the same lighting and color temperature scene. This I was able to use once I quit and relaunched Phocus. It is that simple.
NOTE: When using the Spyder Checkr software, you have 3 rendering mode options:
- PORTRAIT – Which selectively reduces color saturation of skin tone components, both for natural light and studio, while injecting a feeling of liveliness and visual vibration.
- COLORIMETRIC – Will provide the most literal results. Best when attempting to reproduce color critical work. Great for commercial and fashion photography.
- SATURATION – Using this color profile rendering mode will provide a boost in saturation, offering results that are more pleasing for many types of images, such as in fashion photography.
SHOT 1 – PUBLICITY SHOT
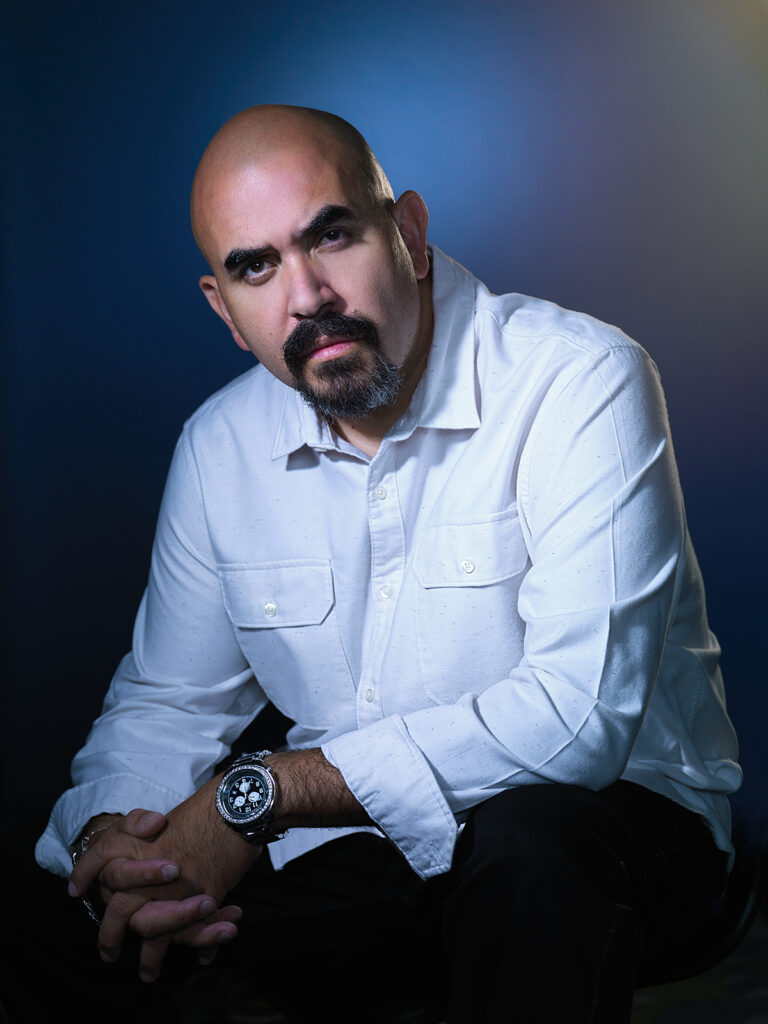
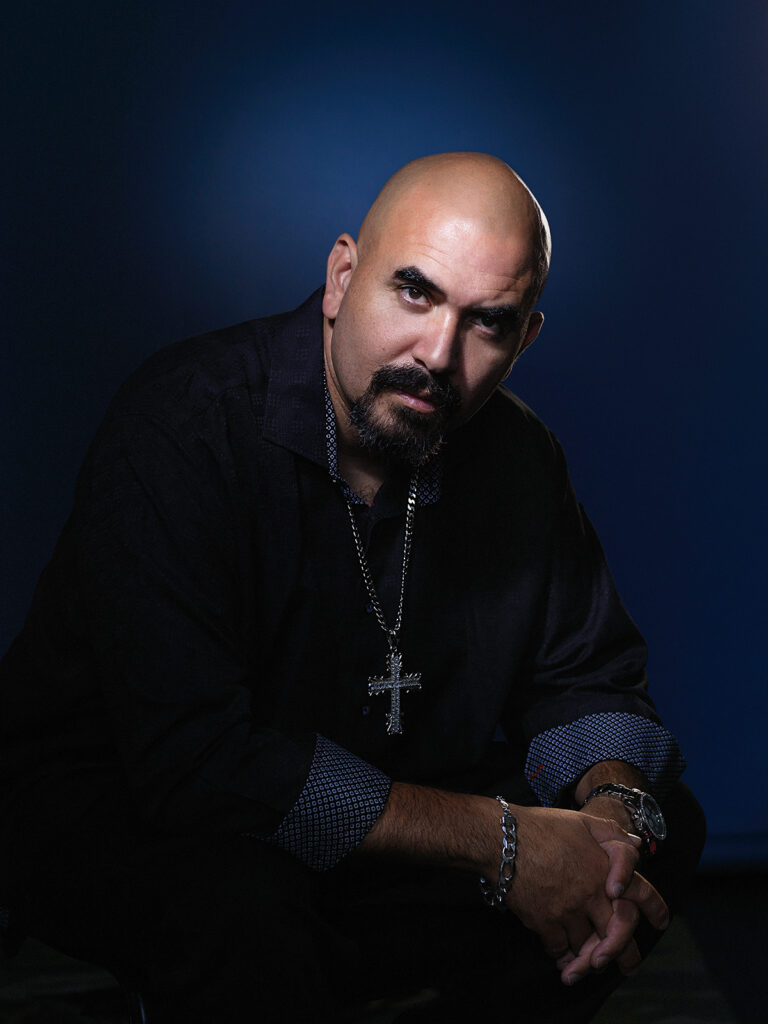
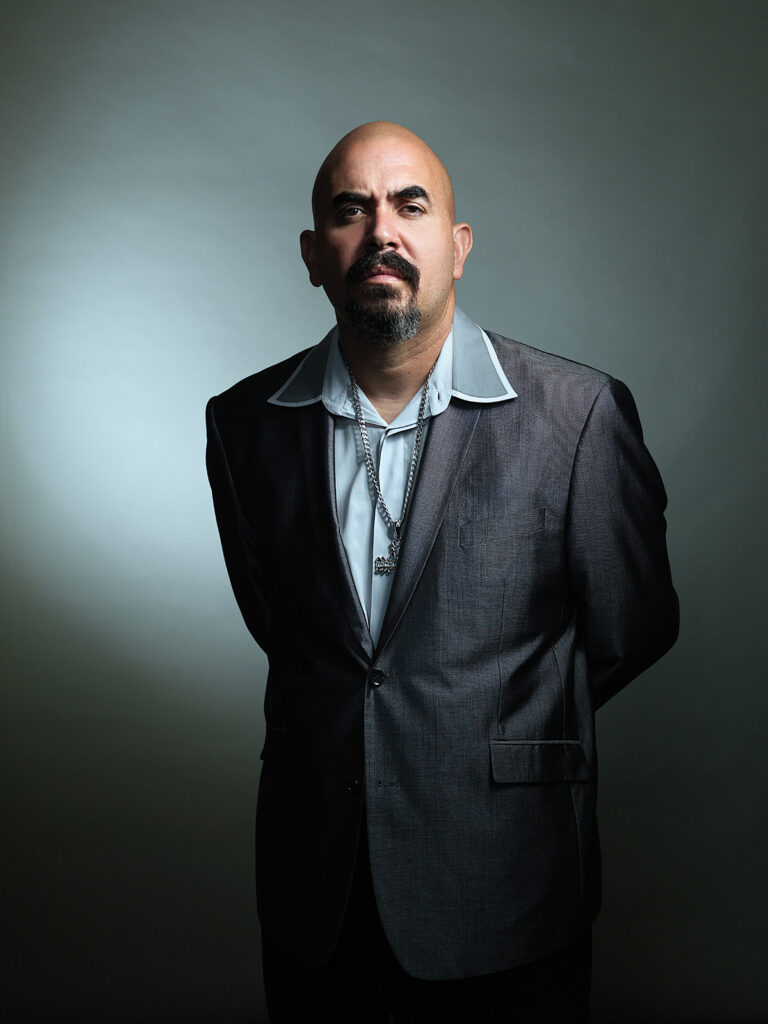
As mentioned earlier, when shooting celebrities, one of the most important shots from the session is a clean publicity shot which they can use for editorial, PR, website, and general purposes. Just a clean, well light portrait. For this setup, I used a Savage Ultramarine blue seamless, which I later switched to a Bone color for a second look.
LIGHTING
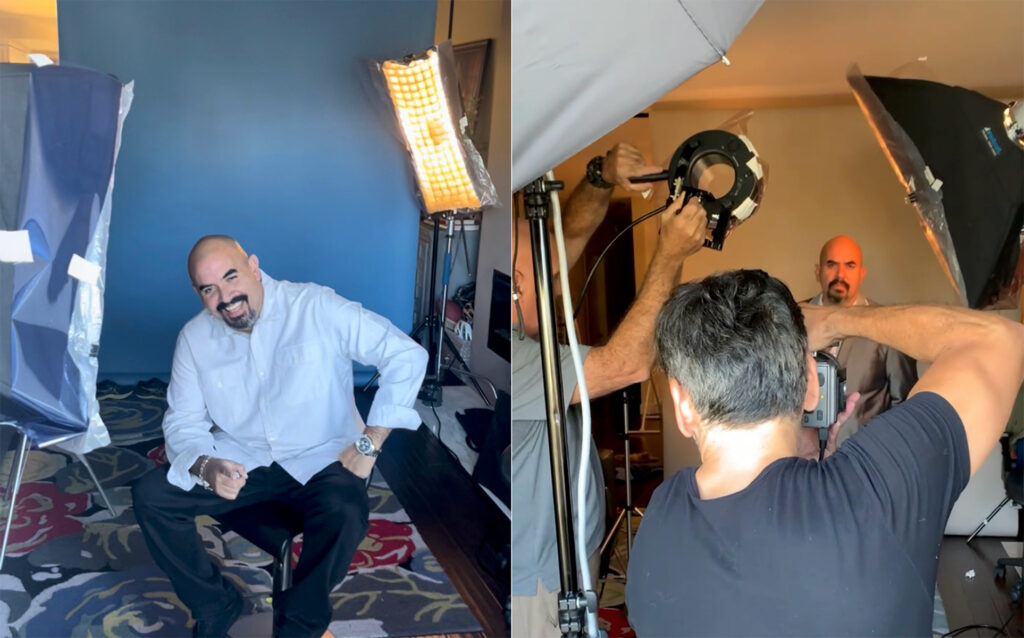
For the key light I used a small compact 12”x18” Westcott soft box, constructed with a silver lining for added contrast. It also makes the image feel “commercial.” I also added a black gobo at the edge of the soft box to control the light spilling onto his white shirt while adding drama to the overall look of the shot. I also added a Rosco blue color filter on all lights used, which I later adjusted by adding the opposite color red, while maintaining slight blue undertones. I rarely use white light for my celebrity work, I am usually adding hints of color and making slight adjustments, once I record a Spyder Checkr card in capture. I will share more on this in a future blog. My key light was metered at F/11 after I added the blue filter. For my fill light I used a combination of two lights. One was a white satin bounce umbrella set directly behind and over my camera axis. This metered at F/5.6. The second was a ring flash set directly from my camera and was metered at F/4 for a combined reading of F/7.1. This minimized some of the contrast while still maintaining rich shadows with detail. I added one 24”x36” grided strip box with a Rosco Sepia filter as an accent light, set behind Noel at camera right for added impact. This was set 1 stop more than the key light. Lastly, I placed a grided flash head on the background for separation and varied the angle and intensity for different looks.
SHOT 2 – PUBLICITY SHOT
After a quick wardrobe change, a second version of shot 1 was created by changing the background to Bone color. I began by swapping the small 12”x18” soft box for the 24”x36” as the key light. This increased the focus of the light as well as the lighting ratio, adding more contrast and interest. The two fill lights remained the same. I also changed the angle of the background light to a much higher angle, and I also increased the intensity of the light. Overall, I was quite content with the results of this second shot. It took at most 3 minutes to reset this shot, given that the subject and background proximity did not change, and the final exposure remained the same.
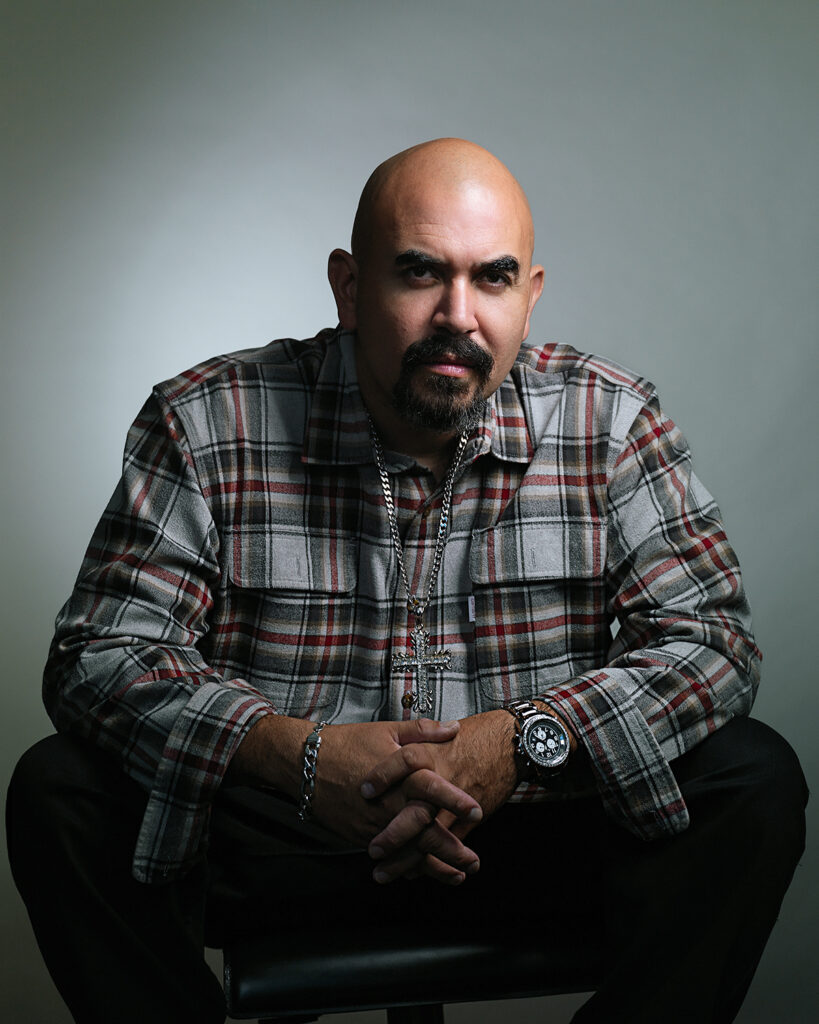
TIP: With all lights in place, you can quickly change to a variety of different looks by adding a black or white velvet on top of your seamless paper roll and a wardrobe change as in the black and white images of Noel. This keeps a quick flow to the session, which makes the client happy.
SHOT 3 – LIFESTYLE EDITORIAL SHOT
For this series of shots, I wanted to see Noel’s natural personality come through the images. We shot these in the interiors and worked on some natural poses both standing and seated. The first step was to measure the ambient exposure. This ambient exposure metered at 125th of a second at F/4, ISO 100. I simply set my flash one stop less at F/2.8 as a weak fill. This helps create natural looking portraits and not seem over lit. You simple just add flash to fill in the subject. Since the natural light was coming in from a set of bay windows, I made certain to keep my flash set from the same direction, creating one fountain of light.
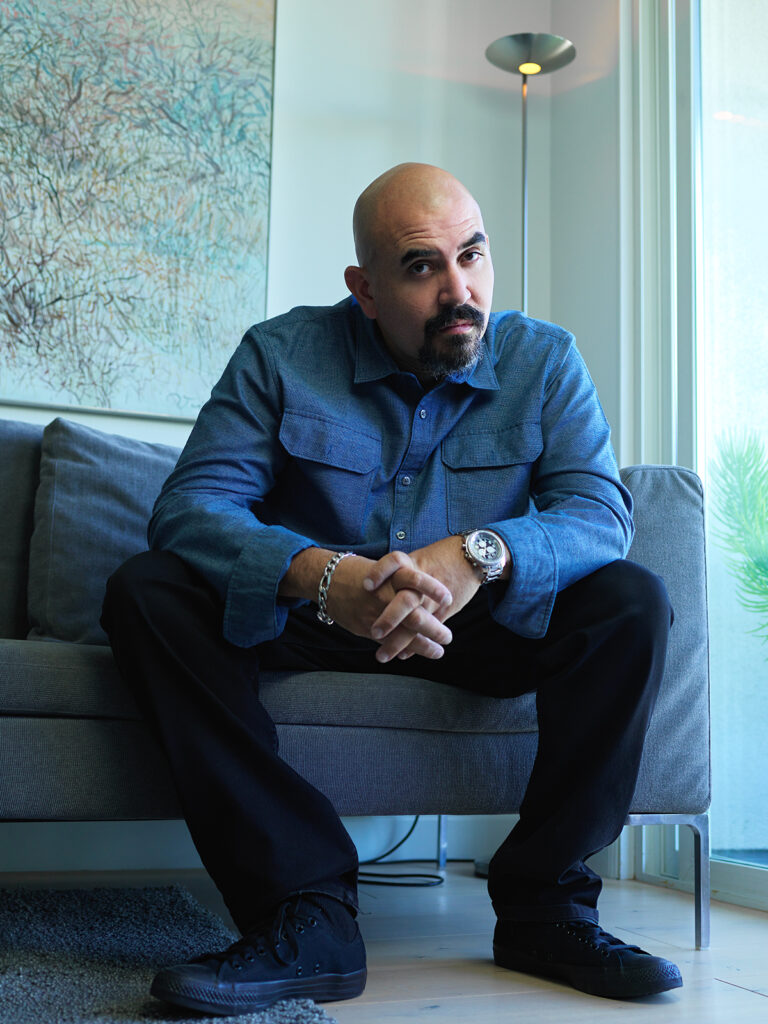
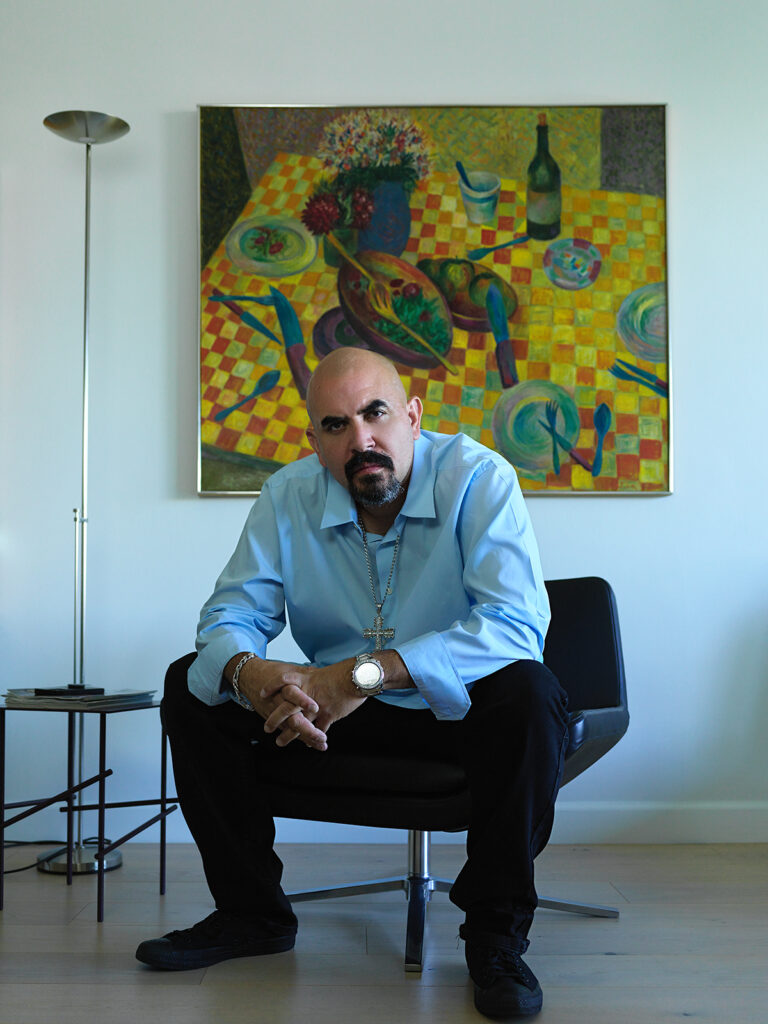
TIP: One principal factor to consider when mixing natural light with flash, is to try and match the quality of the existing light with the quality of light you create with your modifier. Since Noel was nearby a large window with strong afternoon sun showing through, I tried to match the shadows existing in the room. A soft box would have been too soft, and a hard directional light would have created too much contrast. I chose to use a white satin umbrella, which was somewhere in the middle.
WHITE BALANCE
When working with mixed lighting scenarios, it is important to take note of your white balance selection. The light can be a bit warmer at the point of entry, but as it falls off, it can be a bit cooler, even more so in the shadows. This is where the Spyder Checkr Photo comes in handy. It gives me a quick reference target as I have both lights in place, and it records the cumulative reading of both lights, securing accurate rendering of skin tones. I most often do this step at capture, though you can also use the target reference in whichever post processing software you use.
SHOT 4 – OUTDOOR EVIROMENTAL SHOT
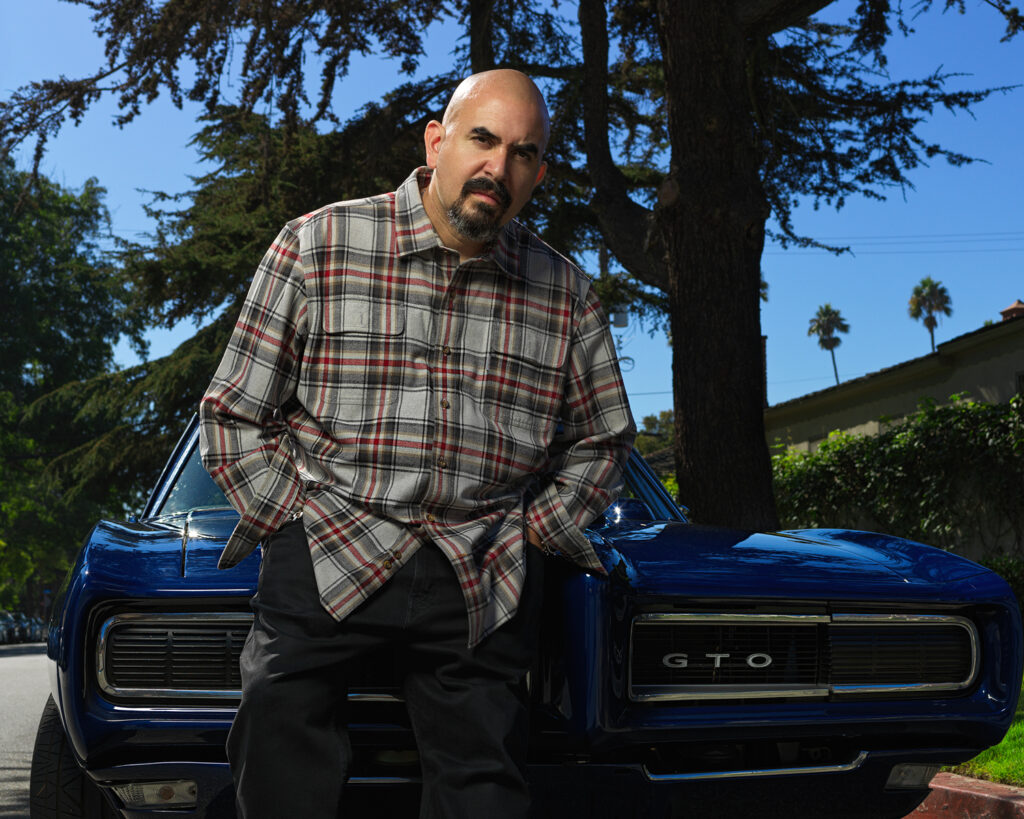
This is where we had fun with Noel. Being that he is known for “Fast & Furious” cars, it only made sense to have him next to an iconic car, like the cobalt blue GTO we used.
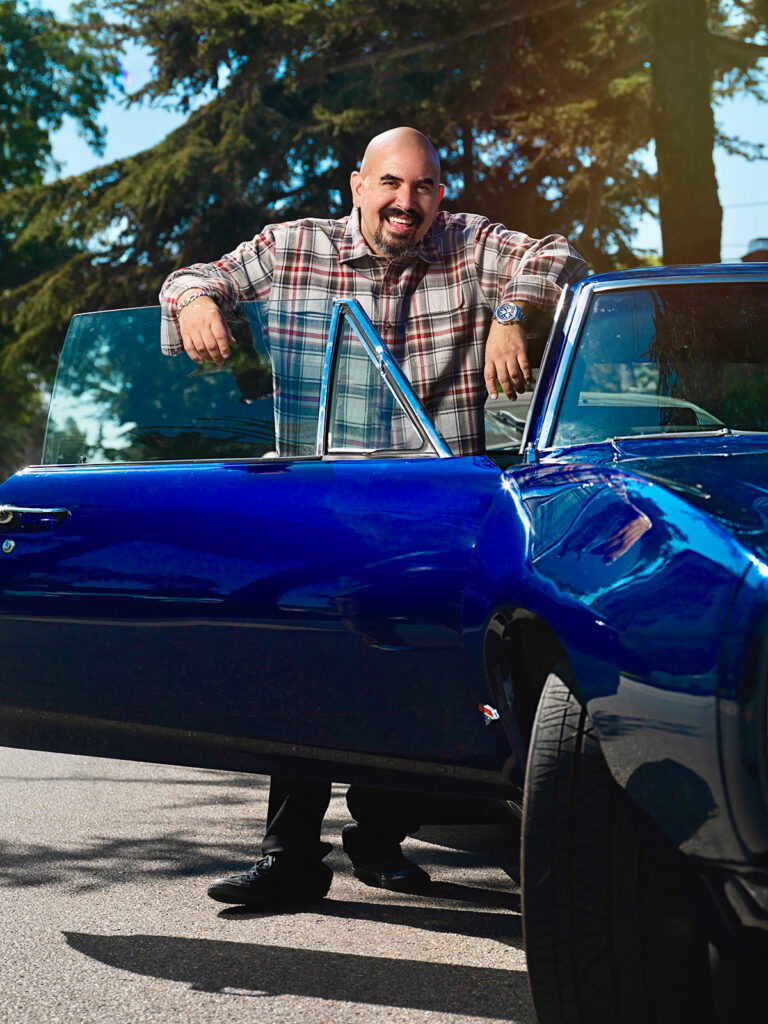
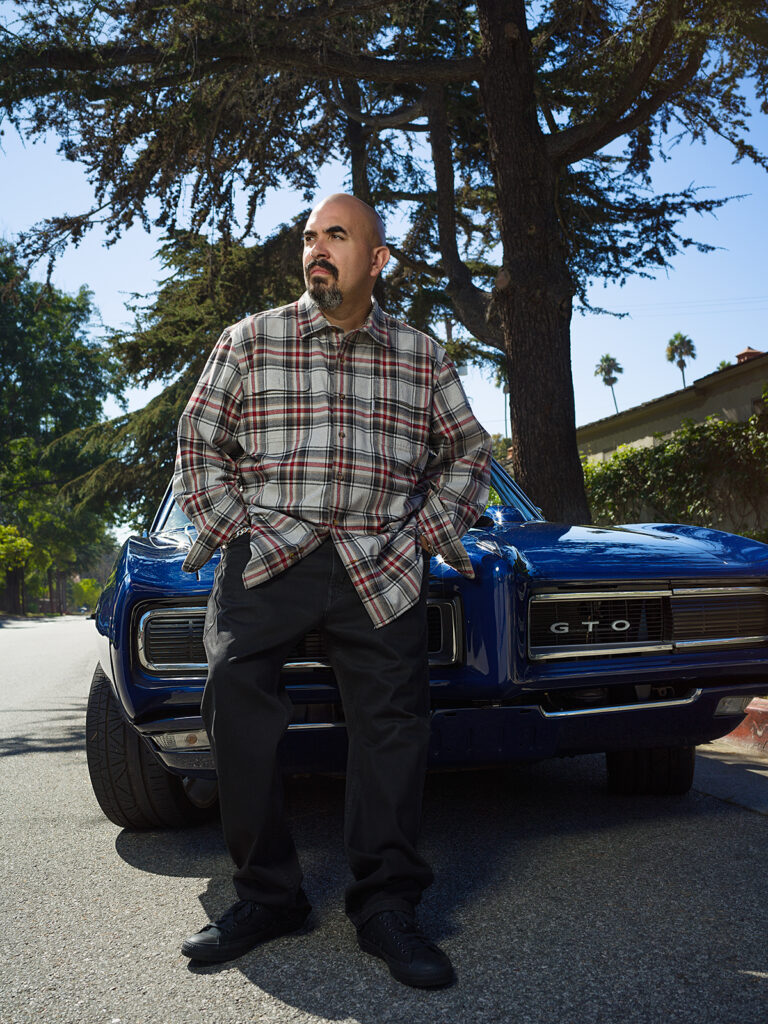
The first thing I considered was the type of lens selection I would use. Since we were creating a narrative for the outdoor shot, we decided to incorporate some of the elements such as the car and the scene to tell the story. I used the Tamron 35mm. lens for the perspective and composition it creates without distortion. The lens also keeps a broader depth of field and keeps many of the elements in phocus, opposed to a variable zoom lens, which has a quicker focus falloff. To keep the focus on Noel and on the front of the car, I used a small 16”x18” beauty dish without diffusion to match the quality of light in the scene. This light was held high and from a top rear angle to mimic the angle of the sun.
I began by taking a meter reading of the ambient exposure, which metered 1/500th of a second at F/11. I stopped the ambient exposure to 1/750th of a second for a more cinematic feel to the shot. The exposure created dark rich shadows with color saturation. By placing the front fill light on Noel, I was able to balance the exposure, while maintaining detail in the shadows where the light struck the subject. The beauty dish metered at F/8, ISO 100.
FINAL THOUGHTS
Considering all we had going with the multiple setups and various wardrobe changes, along with our shot list, it turned out to be a successful shoot. Post covid, I find myself shooting more in these types of scenarios – a type of a hybrid studio. The success of such an approach is preparedness along with fluidity and execution. Having a shot list brings an awareness of an upcoming lighting change or a set change. The Spyder Checkr Photo is always a pocket away for keeping me consistent in my white balance and color, whether in camera, or for my post processing. It really is one of the tools that keeps my execution of the job precise.
